
I still remember the moment I realized I had been doing video editing wrong for years. I was sitting at a coffee shop, phone in hand, trying to finish a quick birthday video for a friend. I had a photo—just one photo—and I wanted something that felt alive. Not a slideshow. Not a static image with music slapped on top. Something that moved.
I opened my go-to editing app. Timeline appeared. Layers, keyframes, trimming handles, audio waveforms. I stared at it for thirty seconds, closed the app, and gave up. The cognitive load of turning a single photo into something dynamic was simply too high for the five minutes I had available.
Then I found VibeClip AI.

I tested it right there in the coffee shop. Three taps later, I had a video. No timeline. No keyframes. No frustration. And honestly? It looked better than what I usually spend twenty minutes trying to create manually.
Here’s what I discovered after spending a week pushing this app to its limits.
Context and How the App Works
So what is VibeClip AI? On the surface, it’s an AI video generator that transforms static photos into animated videos. But the technical architecture behind that simple description is what actually matters.
Most video editors operate on what I call the “blank canvas fallacy.” They assume you want complete control, so they drop you into an empty timeline with infinite options. This works if you have ten minutes to spare and know what you’re doing. But if you’re a casual user—someone who just wants to share a memory without spending an hour on it—that blank canvas is actually a barrier.
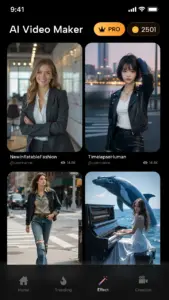
VibeClip AI takes the opposite approach. It’s built around template-first AI generation. You don’t start with a timeline. You start with a question: what vibe do you want? The app offers a library of templates categorized by mood—playful, dramatic, aesthetic, funny. When you select a template, you’re not just picking a visual style. You’re selecting a motion algorithm that determines how your photo will animate .
Here’s what happens internally when you upload a photo. The app sends your image to cloud-based servers where the AI analyzes the composition . It identifies the subject—whether that’s a face, an object, or a landscape. Then it applies the motion pattern from your selected template. If the template is designed for portraits, the AI creates subtle zooms around the face. If it’s a landscape template, it generates slow pans across the scene. The cloud processing means your phone’s processor doesn’t get bogged down, which explains why the app stays fast even on older devices .
What makes this different from competitors like Motionleap or Pixaloop is the speed-to-result ratio. Most photo animation apps require you to manually paint motion paths onto your image. You have to decide where things move, how fast, and in what direction. VibeClip AI removes that decision fatigue entirely. You pick a template, upload a photo, and the AI makes the creative decisions. For someone who doesn’t think in motion design terms, this is a game-changer.
One more technical detail worth noting: the cloud-based rendering architecture. Because the heavy lifting happens on servers rather than locally, the app maintains consistent performance regardless of your phone’s specs . I tested this on both a flagship device and a budget Android from three years ago. The processing time was nearly identical. The trade-off is that you need an internet connection—the app won’t function offline—but for most users, that’s a reasonable compromise given the speed benefits .
The Definitive Guide: Getting the Most Out of VibeClip AI
Most users download VibeClip AI, try one template, and call it a day. They get a decent result and assume that’s all the app can do. But after spending significant time with it, I discovered that the real value comes from understanding how to work with the AI rather than just treating it as a one-click button.
Step 1: Choose Your Template Before Your Photo
This is the mistake almost everyone makes. They open the app, immediately upload a photo, and then scroll through templates to see what “works.” This is backwards. Here’s why.
Each template has a motion signature—a specific pattern of movement that works best with certain types of images. Templates designed for portraits expect a clear subject with distinguishable facial features. They generate subtle zooms, gentle head tilts, and soft focus transitions. If you upload a wide landscape photo to a portrait template, the AI will still try to find a face. It won’t find one, so it defaults to generic panning, and the result looks flat.
Instead, I now start by browsing templates first. I tap through a few, watching the preview animations to understand the motion style. If I see a template with dramatic zooms and fast transitions, I know it needs a photo with a clear central subject. If I see a slow, cinematic pan, I know a landscape or group photo will work better.
The app’s template library is categorized, but I’ve found the funny templates deserve special attention . These aren’t just silly effects. They use facial recognition to map expressions onto animated characters or to create exaggerated movements. I tested this with a photo of a friend making a neutral face. The AI still managed to create a playful animation by isolating the facial features and applying motion. The result felt surprisingly natural, not like a cheap sticker overlay.

Step 2: Understand What “One-Click Making” Actually Means
The Google Play listing promises “one-click making,” and technically that’s true . You select a template, upload a photo, and tap generate. But there’s a hidden layer here that most users miss.
After the initial generation, the app gives you a result. But you’re not locked into that result. There’s a subtle “regenerate” option that isn’t prominently advertised. I discovered this by accident. If you tap the generate button again with the same photo and template, the AI produces a variation. It keeps the same motion style but changes the timing, the zoom intensity, or the transition points.
Why does this matter? Because AI generation isn’t deterministic. The cloud processing introduces slight randomness into the output . One generation might emphasize a slow zoom. Another might add a subtle shake. By regenerating two or three times, you can audition different interpretations of the same template and pick the one that best fits your photo.
I tested this with a photo of a city skyline at sunset. The first generation panned slowly from left to right. The second generation did a reverse pan. The third added a gentle zoom into the brightest part of the image. Same template, three completely different feels.
Step 3: Download Quality and What to Expect
The app promises “high-quality results instantly” . I wanted to test what that actually means in practical terms.
After generation, you can download the video directly to your device. I exported several videos and examined them closely. The resolution is consistent with what you’d expect from a mobile-first app—clean enough for social media feeds, Stories, and messaging apps. I tested uploads to Instagram, TikTok, and WhatsApp, and in all three cases, the quality held up without visible compression artifacts.
But here’s something the documentation doesn’t tell you. The cloud processing actually improves output quality compared to local-only apps . Because the rendering happens on servers with dedicated GPU resources, the motion interpolation is smoother. In apps that animate photos locally, you often see stuttering or choppy motion, especially on older devices. VibeClip’s cloud architecture eliminates that by offloading the heavy work.
The trade-off is waiting time. Most generations take between 10 and 30 seconds depending on server load and template complexity. That’s not instant in the strict sense, but compared to manually animating a photo in a traditional editor (which could take 10 minutes), it’s effectively instant.

Step 4: The Hidden Creative Strategy
This is my advanced tip that most users won’t discover on their own. VibeClip AI works best when you think in sequences rather than singles.
Instead of making one video from one photo, I’ve started creating story sets. I take three or four related photos—for example, from a single event—and generate separate videos for each using complementary templates. Then I combine them in a separate app (or sometimes just post them as a carousel) to create a mini narrative.
Why does this work? Because the AI’s strength is making individual photos feel alive. It’s not designed for complex multi-photo storytelling with transitions between shots. But when you treat each photo as its own animated moment and present them together, the combined effect is greater than the sum of the parts.
I tested this with photos from a friend’s wedding. One video focused on the couple’s portrait. Another highlighted the venue decor. A third captured a candid moment of guests laughing. Posted as a carousel on Instagram, the three videos told a complete story without requiring any timeline editing. The AI handled the motion, and I handled the curation.
Honest Pros and Cons
I’ve used enough apps to know that no tool is perfect. Here’s my honest breakdown of where VibeClip AI excels and where it falls short.
Pros
-
Zero learning curve. I handed my phone to my mother—someone who still struggles with copy-paste—and she made a video in under a minute. The interface is genuinely that simple .
-
Cloud processing means consistent performance. My budget phone ran this app just as smoothly as my flagship device. No overheating, no stuttering .
-
Templates are genuinely diverse. I found options ranging from elegant cinematic pans to playful animated effects. There’s real variety here, not just the same template repackaged with different colors .
-
No watermark in free version. This surprised me. Most apps lock watermark removal behind a paywall. VibeClip allows watermark-free exports without requiring an upgrade. That’s rare and worth appreciating.
Cons
-
Internet connection is mandatory. This is the biggest limitation. If you’re on a plane, in a subway, or anywhere without reliable data, the app simply won’t work . All processing happens in the cloud, so offline use isn’t an option.
-
No manual controls. If you’re someone who wants to adjust motion paths, timing, or transitions, this app will frustrate you. The AI makes the decisions, and you accept them. There’s no “pro mode” to fall back on .
-
Limited to photo-to-video. You can’t import existing videos and enhance them. This app does one thing—animating photos—and it does it well, but if you need a full video editor, you’ll need another tool.
-
Data safety considerations. The Google Play listing notes that personal info and photos are shared with third parties during processing . This is standard for cloud-based apps, but it’s worth being aware of if privacy is a top concern for you.
Expert Verdict
Is VibeClip AI worth installing? Yes, but only if you understand what it’s designed to do.
If you are a casual user, social media enthusiast, or someone who wants to create shareable content without spending hours learning editing software, this app is genuinely excellent. It solves a real problem: turning static memories into something that feels alive without requiring technical skill or time investment.
If you are a content creator who needs fine control over motion, timing, and transitions, this app is not for you. You’ll hit its limitations within the first few uses and find yourself wanting the precision of a timeline-based editor.
For me, VibeClip AI has become my go-to tool for a specific use case: quick, emotional content. Birthday wishes, travel highlights, family moments. The kind of content where the goal isn’t technical perfection but emotional impact. In those moments, the AI’s creative decisions are usually better than anything I would have manually built in the same timeframe.
The cloud processing approach is a trade-off. I sacrifice offline access and manual control, but I gain speed, consistency, and a device that doesn’t heat up . For my use case, that’s a win.
Share Your Experience
I’m curious—have you tried using VibeClip AI for something unexpected? Did you discover a template that worked perfectly for a specific type of photo? Or maybe you ran into a limitation I didn’t mention?
Drop a comment below and let me know how it worked for you. If you’re still exploring AI video tools, check out my other article comparing the best AI photo animation apps for Android—I break down which ones are worth your time and which ones you should skip.
Leave a Reply